How to Fix a Rotted Fence Post
A fence post is the tall wooden or metal stick that holds up a fence. Over time, especially if the post is made of wood, it can rot. That means it gets soft, breaks apart, or leans because water, bugs, or just old age have damaged it. When this happens, the fence might fall over or look crooked.
But don’t worry! Fixing a rotted fence post isn’t too hard. This guide will help you understand why posts rot and show you step-by-step how to fix one—even if you’ve never done it before.
Why Do Fence Posts Rot?
Most fence posts rot because of water. The part of the post that’s underground gets wet every time it rains or when the ground is damp. If the wood isn’t treated (or protected), the water can soak in and cause it to break down.
Other causes of rot include:
- Insects (like termites) that eat wood
- Old age – wood doesn’t last forever
- Poor installation – if the post wasn’t set in concrete or the concrete didn’t drain well, it can trap water
Tools and Materials You’ll Need
Before you start fixing the fence post, gather your supplies. You may not need every tool listed here, but it helps to have them ready.
Tools:
- Shovel
- Post hole digger (optional but helpful)
- Hammer
- Drill or screwdriver
- Level
- Saw (if you’re cutting a new post)
- Safety gloves and glasses
Materials:
- New fence post (same size as the old one)
- Concrete mix
- Water
- Nails or screws
- Gravel (for drainage)
- Wood preservative (optional)
Step-by-Step: How to Fix a Rotted Fence Post
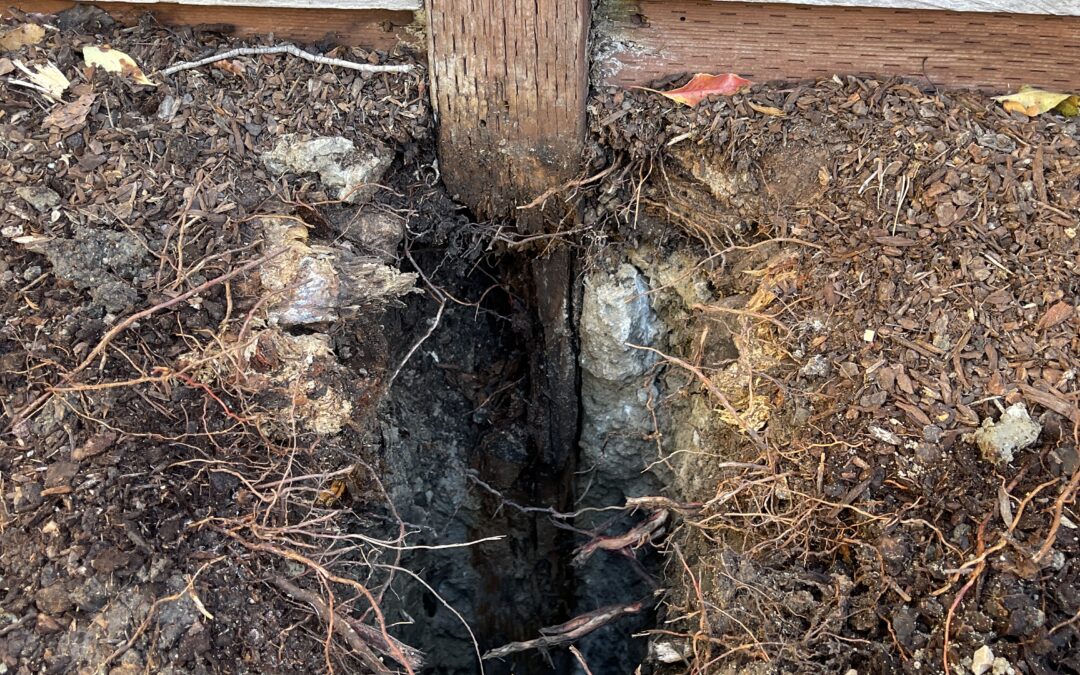
Step 1: Check the Damage
First, gently shake the post. If it wiggles, leans, or feels soft near the ground, it’s likely rotted. Sometimes only the bottom part is damaged, but often it’s best to replace the whole post.
Step 2: Take Apart the Fence
You’ll need to remove the fence panels or rails that are connected to the post. Use a drill or screwdriver to take out the screws, or a hammer if it’s nailed. Keep the screws and nails in a small container so you don’t lose them!
Be careful not to damage the boards—you’ll use them again.
Step 3: Remove the Old Post
Now the hard part: getting the post out of the ground.
- If the post is loose, you might be able to pull it out by hand or with help from a friend.
- If it’s set in concrete, you’ll need to dig around it. Use a shovel to remove the dirt or a post hole digger if the hole is deep. You can also use a pry bar to wiggle the concrete block free.
If the wood is really soft, you may need to break it apart and pull it out in pieces.
Step 4: Dig a New Hole
Once the old post is out, dig the hole a little wider and deeper (about 2.5-3.5 feet deep and 8–10 inches wide). Make sure the bottom is flat.
Add about 4–6 inches of gravel at the bottom of the hole. This helps water drain and keeps the new post from sitting in water.
Step 5: Prepare the New Post
Before you put the new post in, check if it’s pressure-treated. This means it’s made to resist water and bugs.
If it’s not treated, paint the bottom part with wood preservative. Let it dry before placing it in the ground.
Step 6: Set the Post in Place
Add 4-6 inches of gravel to the hole. Stand the post upright in the hole. Use a level to make sure it’s straight. Ask a friend to help hold it still.
Now, add your concrete in dry. Carefully pour it into the hole around the post.
Fill the hole to the top with concrete. Use the level again to double-check the post is straight. Reconnect your rails, fence boards and kickboards. Then add water to the concrete and mix it.
Next, take some of he concrete and mix it with water in a bucket. Use this concrete to form a concrete crown around the post to protect it from the elements.
Let the concrete dry for 24 hours (or whatever the bag says).
Then you’re done!
Clean Up and Check Your Work
Once the fence is back together:
- Put away your tools
- Throw away old wood or concrete pieces
- Walk along the fence and gently push it to make sure it’s sturdy
How to Keep Fence Posts from Rotting Again
You can help your new post last longer by:
- Using pressure-treated wood
- Adding gravel under the post to drain water
- Sealing the wood with a waterproof product
- Keeping plants and sprinklers away from the base of the post
A good post can last 15–20 years if it’s installed the right way!
Summary
Fixing a rotted fence post is a great project for a beginner. You learned:
- Why posts rot
- What tools and materials to use
- How to remove the old post and install a new one
- Tips to keep it from rotting again
With patience, teamwork, and a little effort, you can fix a fence that will stand tall and strong for many years to come.